Another Mandala and how it all came together......
Thursday, 25 July 2013
Thursday, 18 July 2013
Reorganisation
Every eight months or so I get the urge to reorganise the most important area of the house. And as much as I try to suppress that urge, inevitably I find myself knee deep in stuff - with garbage bags, cleaning products and a bigger mess than what I started with. So what is the most important area of the house? Certainly not the kitchen (the heart of the home) Nor it is the lounge room (where we all congregate as a family most nights) Nope, to me, the most important place in the house is my work area. It is were I can let my imagination run wild, where I can loose myself for hours with pencils, paper, polymer etc. And I know it sounds bad - but it also the one place in our home where the kids don't go :)
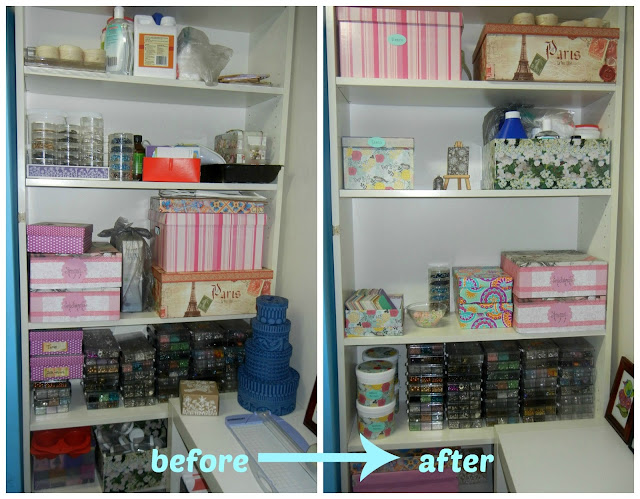
I find that taking before and after pics encourages me to continue and to get the job done. I also find it less daunting if I just focus on one area at a time. And as strange as it sounds, this time I am organising things into specific craft areas. I am putting all of the jewellery making stuff together, all of the paper together etc - logical, I know. But it is a first for me :)
Here are the first two areas I have finished
Bookcase: I love boxes and as long as I remember to put labels on them, I know what is where. This is mainly my odds and sods storage area. As well as beads it also contains my soap making ingredients, ribbons, scrapbooking embellishments and books.
Little Blue Shelves: I have had these for years. I think they were originally used as storage for tools in a railway workshop. I added contact to the bottom, painted them and then filled them with junk interesting things. The before shot has paper, beads, little canvases, ribbon, templates etc etc. The after pic has only jewellery making supplies. I made all of the little boxes out of scrapbooking paper. The owl print on top of the shelves is by Karin Taylor - love her work
I plan on getting more done or all finished this weekend - stay tuned :)
Tuesday, 16 July 2013
Pretty Flower Pin Cushion Tutorial
The pattern for the centre of this flower was inspired by Jacquie at Bunny Mummy and her lovely Sunburst Hearts.
Materials
Assorted leftover 8ply acrylic yarn
3.5mm Hook
Polyfil
Darning needle
Scissors
UK Terms
slst Slip Stitch
chn chain
dc double crochet
Make a magic ring ( a good tutorial for this can be found here)
chn 3 (this counts as your first dc) 11 dc
(for a total of 12 dc)
Pull the magic ring closed, secure it and trim thread.
Slip stitch into 3rd chn of first 3 chn (dc)
Finish thread
Row 2:
Start a new thread with 3 chn into the space between two stitches in the previous row. Double crochet into the same space. *2 double crochet into the next space*
Repeat from * to * until you have 24 dc. Slst into the 3rd chn of first 3 chn (dc) Finish thread.
Row 3:
Start a new thread with 3 chn in the space between two sets of dc in the previous row. 2 dc into same space. *Miss the next two dc from the previous row. 3 dc into next space*
Repeat from * to * until you have 36 dc. Slst into the 3rd chn of first 3 chn (dc) Finish thread
Row 4:
Start a new thread with 2 chn (sc) into space between any two dc from previous row. Sc into each space.
Slst into 2chn of first 2 chn (sc). Finish thread.
Make another circle, exactly the same as the first one.
CONSTRUCTION
With wrong sides together, match up the sc, slip the hook into two corresponding sc, attach thread.
2 slst (sc) Sc into each sc of both circles.
Sc all the way around until you have 6 to go. Stuff firmly and finish sc to end. Slst into 2nd ch of first two.
Petals:
Into the fisrt sc, chain 3 (dc)
2 dc into same place. *Miss 1 sc, slst into nect sc. Miss 1 sc, 6 dc* Repeat from * to * until you come back to the first 3dc. 3 dc into first space. Slst into 3rd chain for first 3 ch (dc). Finish off thread.
And there you have it - one Pretty Flower Pincushion. I had fun designing and making this - so much so that so far I have made 6 of them. May they be as addictive to you as they are to me!!!
This is a free pattern, please feel free to make as many as you like for whatever you like. I only ask that if you share this online that you pay me the courtesy of linking to www.sugarbirdart.blogspot.com.au
Also this is only the third crochet pattern that I have written. If you find any errors, please let me know :)
Saturday, 13 July 2013
Granny squares galore
At the tender age of 13, while watching my Mum crochet around a washer with cotton, I asked her to teach me how to crochet. Surprisingly (looking back now) my first few attempts at washer crocheting failed miserably. My tension was way too tight and the tantrum I chucked was very undignified. Undaunted, my very patient Mum look me down to the local Co-op (this was in the dark ages before Spotlight, Lincraft and bargain stores) and got me to pick 4 colours of 8ply wool. Once home again she started to teach me again- by doing a granny square......and so my love of crocheting was started!
This is the granny square blanket that my Mum taught me to make with those 4 colours of wool. And I am really happy to say that this photo was taken today, as my 10 year old loves it on her bed (so does Joey)
This huge single granny square is not the most elegant thing I have ever made, but I did it while recovering from a life threatening illness - I think it helped to keep me sane and my hands occupied.
And this is the world's ugliest granny square jumper.......but it is warm and took me a week to make - so it is a house jumper only.
This is the cardigan I made to wear at work. The back and front only are done in granny squares
Of course all granny square projects don't have to be a big undertaking. A single one can make a nice bedside table covering.
This is one that I am working on at the moment. It will be a cardigan by the end of next week.
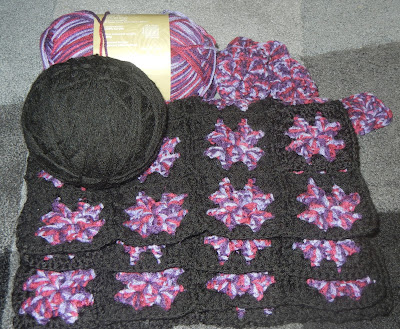
The best thing about granny square rugs is that they are a great way to use up left over wool from other projects. This is my on going winter project - the longer I work on it, the bigger it gets. And it is lovely to work on a project while it keeps you warm.
And this? This is the start of my granny square bag and the tutorial that will go along with it......coming soon.
And the most exciting thing about granny squares? Just as my Mum taught me how to do them and instilled in me a love of crocheting, so now I am doing the same with my 10 year old......and I can always hope that one day she will also pass along this lovely skill <3
Saturday, 6 July 2013
Sonyas Mandala
In my last post I showed you how I started my first mandala. Well, it is all finished now and I am so happy with it and had so much fun with it - I have already inked up the next two.....
Wednesday, 3 July 2013
What's in a name?
My first attempt at a mandala and I am already hooks - such a lovely way to create a design. Here is how it is going so far.......
Pencil drawing
All inked up and ready to add colour.
I used these colours on Funky the Owl and was really happy with them. Plus I promised myself no purple or pink on this one - just for a change.
Then a lovely lady suggested the yellow - and it worked so well, I decided to name the Mandala after her - thank you Sonya :)
Each 'colour' has three layers of colour to give it depth and vibrancy.
All colouring finished.
And now it is all about adding the details....which is what I am still doing now - stay tuned :)
Subscribe to:
Comments (Atom)


.jpg)


