Thursday, 30 May 2013

Paint Tags

I love working with paint sample cards.....so many different colours and so many possibilities.  This time I decided on gift tags because I haven't made any in a while.  And I decided to use white pigment ink.......because it was on the coffee table and I was comfortable on the lounge (of course)
Here is how I made the first set.......


Firstly I picked my colours


I drew circles on the back


I cut the circles out


and then the fun part - I started drawing!


To finish them off I punched holes and added cord - All finished - now onto the next set :)

Saturday, 25 May 2013

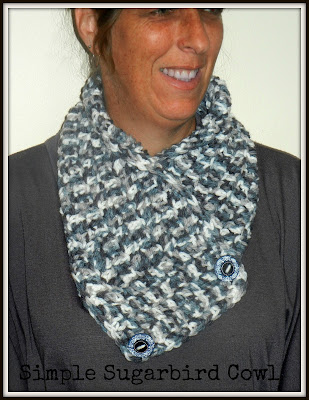
Simple Sugarbird Crochet Cowl Pattern


Simple Sugarbird Crochet Cowl Pattern

This pattern is very simple and easy......because it is the first time I have attempted to write a crochet pattern.  The instructions assume that you know the basics of crochet.

Materials
50gm Ball of 12ply wool
#7 Crochet Hook
2 x 3cm (approx) buttons
Scissors
Darning Needle

Terms
ch.........chain stitch
sc.........single crochet
dc........double crochet

Starting
ch 78


1st Row
dc into 3rd ch from end.  This is counted as 2 dc.  dc into remaining chains for a total of 76 dc. Turn


2nd Row
ch 3 ( this counts as the first dc)  dc 75.  Turn


Rows 3 to 8
Repeat 2nd Row


 Edging
Crochet 1 row of sc around the entire edge of the cowl, using 3 sc into each corner


Finishing
Finish off and weave ends in with a darning needle.


Buttons
Attach buttons and shown in the picture above.  Because of the chunky stitches there is no need for specific button holes. I have used handmade polymer clay buttons, but wooden ones also look nice.


You can always make the cowl smaller or larger by adjusting the number of ch when starting, or the number of rows.

Enjoy :)


Tuesday, 21 May 2013

Coaster Tutorial

Having had my collection of patchwork coasters depleted to nothing by being sucked into the vacuum cleaner, eaten by the cat, and generally going missing in action, I was on the look out for something more sturdy and robust.  This is what I came up with after wondering through the internet, rather than the shopping centre, Mod Podge Coasters.......


You will need
Square ceramic tiles from a hardware or tile store.
Scrapbooking paper, wrapping paper, or spend 3 hours drawing your own images like I did.
Mod Podge
Sponge Brush
Foam or rubber circles or squares
PVA Glue


Cut your paper 1cm smaller than your tile - My tiles are 9.5cm x 9.5cm so my paper is 8.5cm x 8.5cm


Using the sponge brush, apply Mod Podge evenly to the back of the paper, and position it on the tiles.  Press down on the paper firmly, especially around the edges.


Set aside and allow to dry for around 20 minutes


Brush one coat of Mod Podge onto the entire top of the coaster.  Set aside and allow to dry for around 20 minutes.  Repeat for another 3 coats.


Onto the back of each tile glue foam or rubber feet.  Allow to dry


I am thinking that these would also make good birthday and Christmas presents, especially if the drawings were more personalised.  You could also use greeting card images, photos or even fabric.....so many posibilities....

Saturday, 18 May 2013

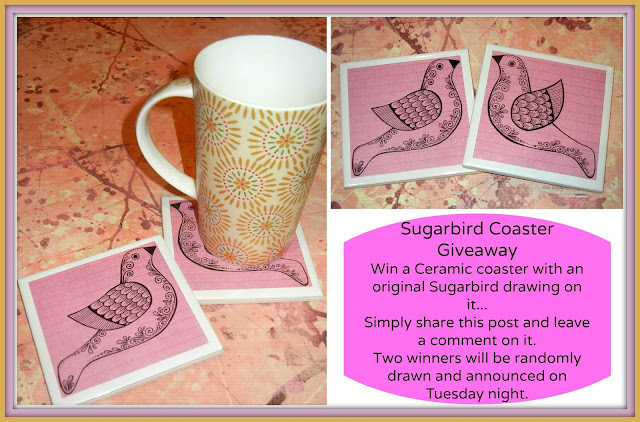
Sugarbird Coaster Giveaway

Yesterday I blogged about some coasters I was making.  Well, they are all finished, and while I am working on the tutorial for them, I thought it would be fun to have a giveaway of two of them.
The giveaway is happening on the Sugarbird facebook page.  I would love you to drop by and enter!!


Friday, 17 May 2013

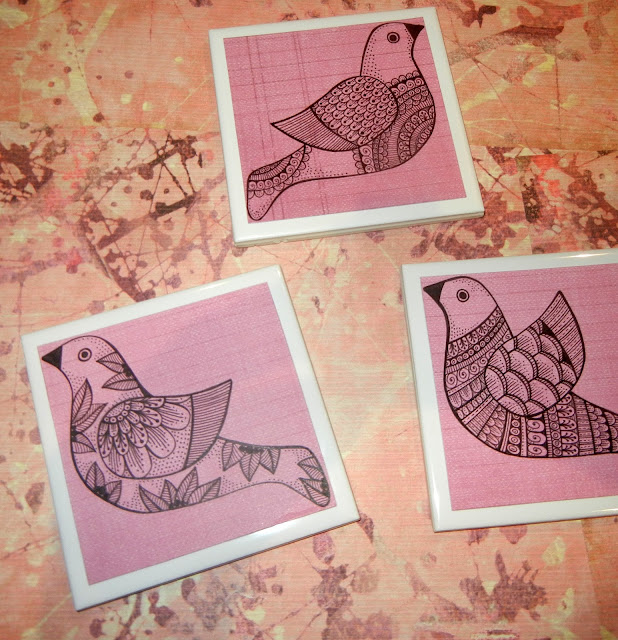
Sugarbirds for coasters

It never ceases to amaze me the number of different crafts you can find, simply by wondering through the internet.  I particularly enjoy discovering them on google images and Pinterest.  One of my favourites at the moment is Mod Podge Coasters.  Not only did I need some new coasters, but it gave me another excuse to draw Sugarbirds.  Here is how my latest set  developed.


And here they are all ready to be pod podged.  Tutorial to follow........

Friday, 10 May 2013

Doodle Bird Panel

A couple of posts ago I did a mini tutorial on how I draw my owl eyes.  What I ended up with was a half finished owl eye on an A4 sheet of paper, so obviously, instead of continuing on and drawing the rest of the owl (I had just finished 5 owls) I decided to try something a bit different........and so began the Doodle Bird Panel.  

It took me about 2 weeks and around 40 hours to complete and although at some stages I doubted I would ever get it finished, I really, really enjoyed doing it and can't wait to start another one (yes, I am a glutton for punishment)  It is so packed full of details and patterns, that it never got boring and even now I still enjoy looking at it.  Here is how it progressed.


I also really enjoyed adding some collage pieces into the design - something new for me.

And here is the finished image.  


Prints are available for sale on my facebook page

  
And t-shirts are available through Redbubble.

Thursday, 9 May 2013

Mother Nature rocks!!

I know it is not summer and technically the flowers are not blooming, but my garden is just bursting with colour and I wanted to share it with you all.........


Related Posts Plugin for WordPress, Blogger...