Somebody mentioned on Sugarbird's facebook page the other day that they would love to see how I make my Accordion books (hi Noemi) So I thought I would share how I made one of my latest ones. I am still having great fun with the white pigment ink, but think after this weekend I will move on to other things. It has just about run its course........for now.
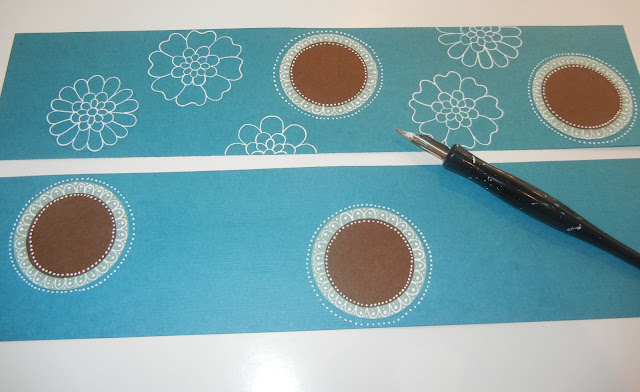
Firstly, I cut two strips of card stock and lightly marked where the folds would be, in pencil. Then I glued the light green and brown discs into place, making sure to place them away from where the folds would be. Then I decorated the discs and started the freehand flower drawing (my favourite part)
Notice that I didn't draw near the edges where the two strips join. Once they were joined and the accordion folds were made I then completed the drawing so the images look seamless.
The final steps were to add the text in the brown discs, the ribbon to the back cover and then a front and back cover piece. All attachments were done with double sided tape.
And there you have it. One completely handmade, one of a kind, original little accordion book, which will be shuffling over to Sugarbird's facebook shop in the next couple of days :)


Beautiful! Thanks for sharing Karen :)
ReplyDeleteI just love your work, its absolutely beautiful.
ReplyDeleteBeautiful work Karen !
ReplyDeletelovely work Karen and a good job on the tutorial :)
ReplyDeleteYour work is so beautiful - thank you for sharing!
ReplyDeleteThis is so beautiful Karen !
ReplyDelete